Saturday I folded and sewed. I found ironing the folds on the clamped pieces made for more accurate folds. I also found ironing the straight pleats for sewing made the sewing easier.
Itajime shibori is a shaped-resist technique. Traditionally, the cloth is sandwiched between two pieces of wood, which are held in place with string
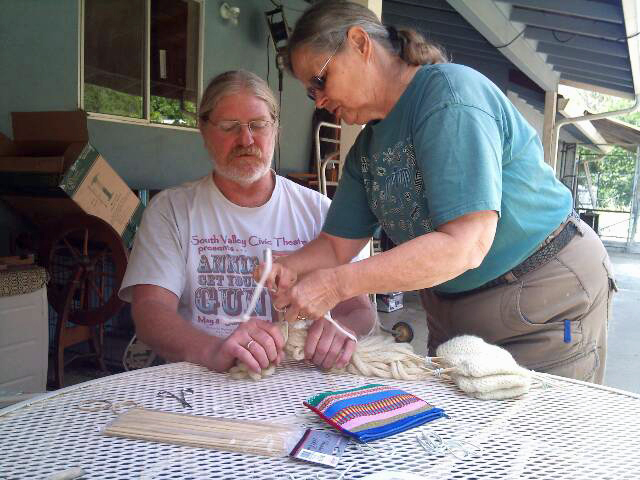
Nui shibori includes stitched shibori. A simple running stitch is used on the cloth then pulled tight to gather the cloth
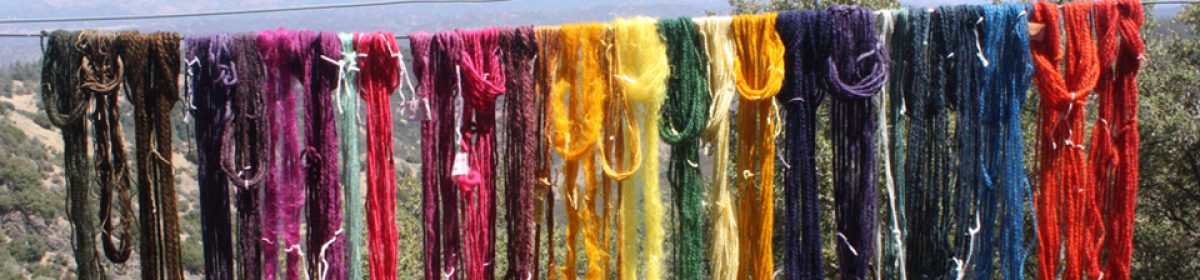
Our indigo pot was strong and hearty. I brought cloth to dip into the pot and decided to put little rubber band resists all over the cloth to see what it would do. I did one, two and three rubber bands in different places. The three rubber band method turned out the best. Shown in the photos is the cloth after one dip with rubber bands still in and one after the indigo had oxidized. I was very happy with the results.
One long indigo dip of 20 minutes with rubber band resist.Rubber band resist, indigo dye. One long dip of 20 minutes.
I decided to do 2 small pieces 18 X 11 inches. These will be used for covering the covers of handmade books.
Piece #1 I accordion pleated the long way with 1 1/2 inch pleats, giving me an 18 inch strip 1 1/2 inch wide. Then I pleated the the other direction in 1 1/2 inch pleats. This gave me a cube that I tied several times around both directions.
Piece #2 I accordion pleated the long way with 1 inch pleats, giving me an 18 inch strip 1 inch wide. Then I tied the strip about every 2 inches.
Shibori tied cloth, ready for indigo bath.
I then dipped them in the indigo 3 times; The 2nd and 3rd time I dipped Piece #1, I opened the folds on the corners slightly.
Piece #1Piece #2 right after one indigo dip.
Our dye pot was Strong so I only left the pieces in for 1 to 2 minutes.
This after 1 dip of 1 minute
Here are the pieces wet.
Piece #1 wetPiece #1 rinsed and dryPiece #2 wetPiece #2 rinsed and dry
Very little dye rinsed out and there is no crocking. As you can see the darkest blues are almost as strong dry as they were wet!
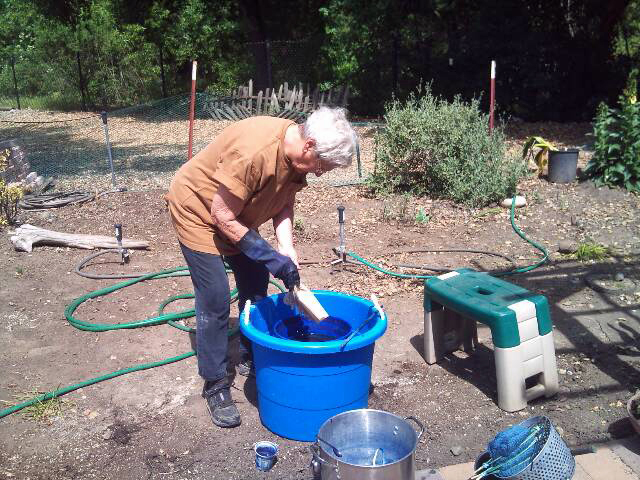
We met in Phyllis’s back yard. Sandy prepared the indigo pot, making sure the chemical balance was working well to produce this natural blue dye.
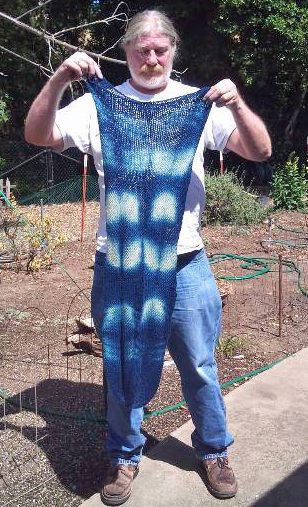
Frank had knitted a bag that he was going to felt. But before it was felted, he wanted to dye it in the indigo bath.
The bag and strap were tied in areas where he wanted it to resist the dye.
Although the dye appeared to be weak, he dipped all pieces four times and got a beautiful dark blue that did not crack off when washed and rinsed in vinegar.
Next he will felt it and we will see the results next month.
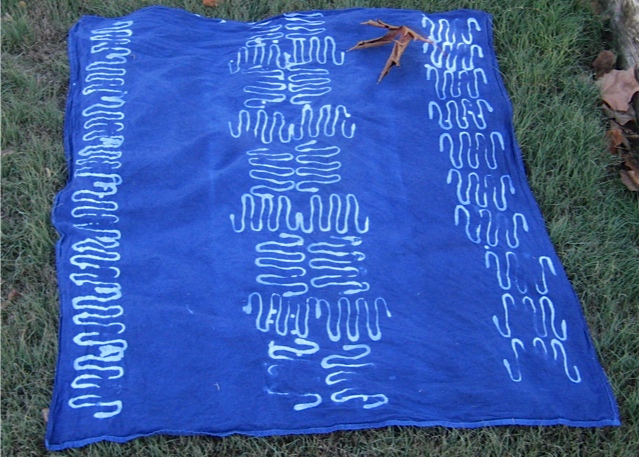
On September 24th, the group met with the intent to do wax resist on fabric and then dyeing the fabric with indigo. Below is a beautiful example, created by our member Phyllis Karsten with a simple white kitchen towel and a potato masher.
We had a wonderful indigo dye day today. Frank Mikulastic and Sandra Kupper had items to dye. We have been experimenting with shibori folding techniques and tried some new ideas today.
Frank started with white cotton fabric. He folded the fabric in the long direction and then folded it into a triangle bundle. He then wrapped rubber bands around the outside to hold it together in the dye bath.
He dipped it into the dye bath 5-6 times and the fabric got darker with each dip into the indigo. (With indigo, the best way to get a darkly dyed fabric is to do multiple dips, not with stronger dye.)
Sandy wrapped her fabric around a pvc pipe and tied it with string then dip dyed it about 3 times for a fantastic looking diagonal stripe.
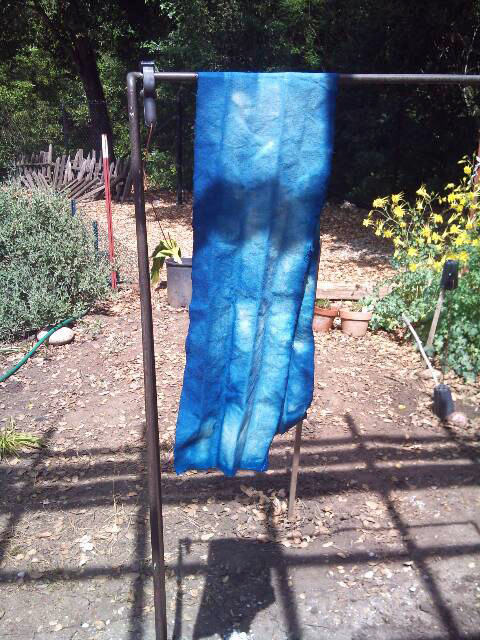
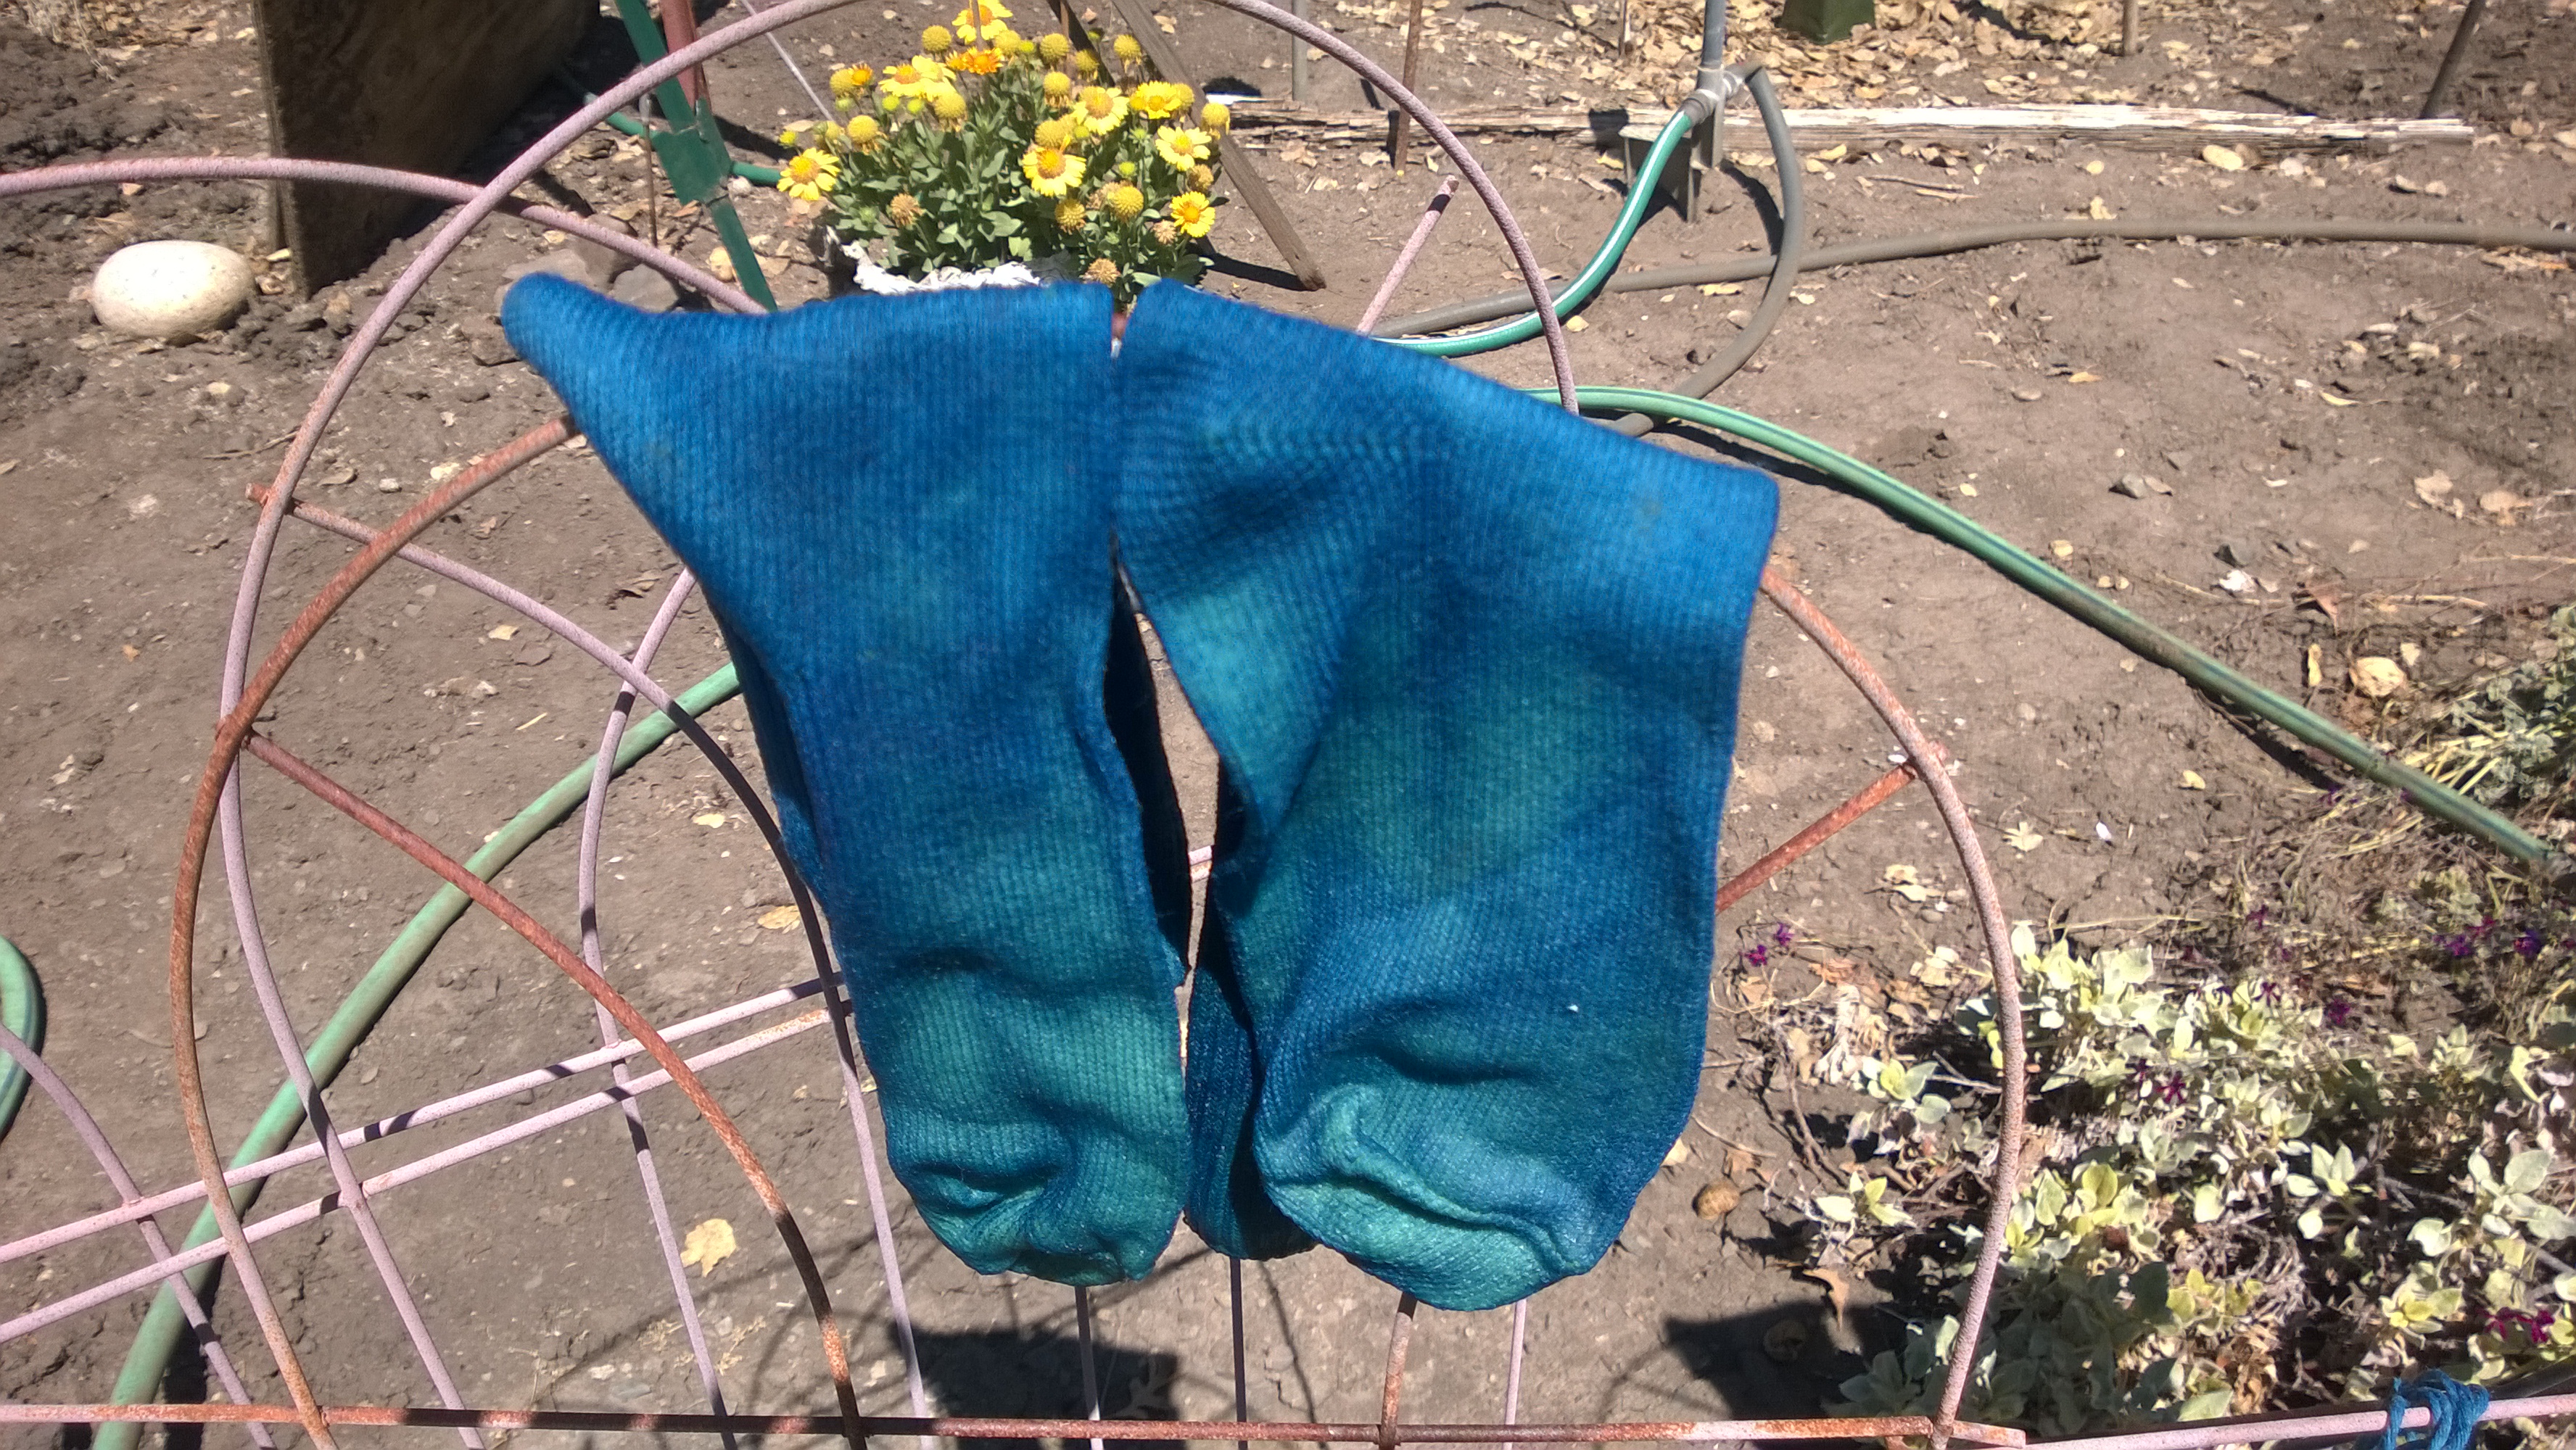
She also dyed socks and a t-shirt – both had been unsuccessfully dyed once before with procion type dyes. Both items dyed beautifully this time.
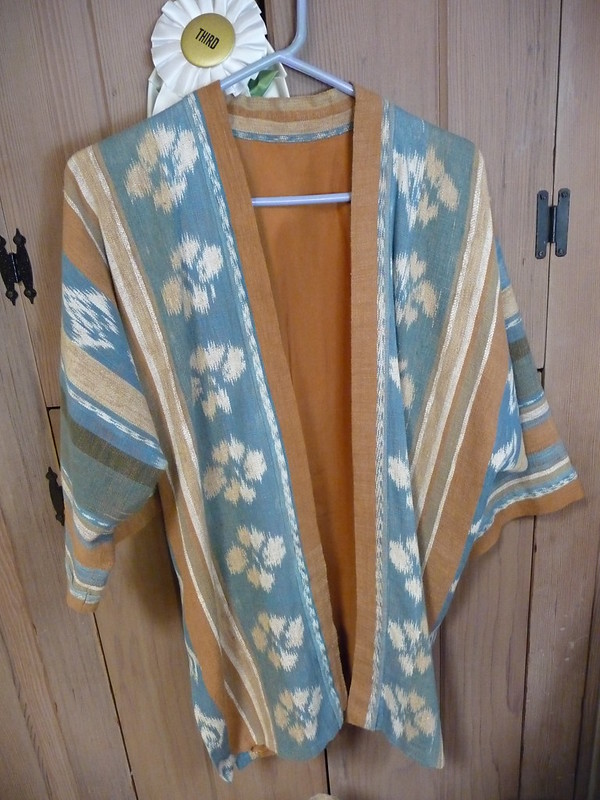
I consider this my most spectacular project – also it is one of the best pieces of weaving I’ve done. The third place ribbon from the CNCH judges at the Marin fashion show got it wrong. their comment was that it didn’t hang straight.
Well, it was not intended to be a up-tight western style jacket. It was patterned after a Japanese style that is OK to hang loosely.
And, I didn’t want to have shoulder pads in the jacket as they would either be inside the lining, which would mean that I’d have to open up the lining if the pads deteriorated. I didn’t like the appearance of pads tacked to the outside of the lining. I solved that problem by putting shoulder pads in the blouse that I made to go with the jacket. The judges didn’t know that. Next time I will be certain to add a note to my entry – A little learning opportunity on entering items.
I usually wear the jacket with blouses that have no shoulder pads. It hangs loosely with the expected informal hem line, but looks just great!.