Working Alone Together

With the new normal imposed by Covid-19 our monthly meetings have been suspended indefinitely. However this does not mean we have been idle. We still communicate with each other. Here are photos of projects from Natalie, Sandy, Sharolene, and Frank.

Here is Natalie’s no-pattern knit cardigan and the beginning of her basket being made from fabric and yarn.

no-pattern knit cardiganbasket making in progress with yarn and fabric


Sandy, our tapestry aficionado, finished her stunning tapestry of a burro. Those of us who have been learning tapestry techniques from Sandy are left speechless.

Sandy's tapestry burro


Sharolene has added three tops and a hat to her wardrobe and has some new yarn to experiment with.


Frank has stunned us by learning to do Irish needle lace and making this memorial piece for his neighbor’s cat out of hand-spindle spun cat fur. It measures 4.5 x 4.5 inches.

Handspun needle lace

Hand spindle and cat fur

Who knows what the rest of us may be working on! We are eager to get together again to share our love of fiber.


By early October our prolific tapestry weaver, Sandy, finished her tapestry called My Father’s Ghost and is already hatching ideas for her next tapestry.

______________________________________________

Frank has caught the tapestry bug fish too. Here is his Fish in a Tin.

Our Tapestry Samplers

We are continuing the tapestry project we started last January. Every month we learn a little more. This month some of us finished our samples and are looking forward to designing our own tapestries now that we know some of the tricks to making shapes, dyeing our yarn with natural dyes, and starting and finishing our piece. Here is a glimpse of this ongoing project.

members of Fiber Artisans working on their tapestry looms
Members of Fiber Artisans working on their tapestry looms


Natural Dyes: Our Results

Today we surveyed the results of our recent project and divided our skeins among our members. In recent months we have experimented with indigo, weld, osage orange, cochineal, and walnuts. Here is what we have.

  • Weld mordanted with soda ash to adjust the pH and boiled (top, left)
  • Osage orange – we found that pH matters (bottom, left)
  • Osage orange overdyed with indigo (top, second from left)
  • Weld overdyed with indigo (top, third from left)
  • Indigo overdyed with walnuts (top, fourth from left)
  • Indigo dipped three or four times for two minutes (top, fifth from left)
  • Indigo dipped once for two minutes (right end)
  • Light indigo overdyed in cochineal afterbath (bottom, right)
  • Cochineal mordanted with cream of tartar to adjust the Ph dipped for ten minutes (bottom, second from right)
  • Cochineal mordanted with cream of tartar to adjust the Ph dipped for one hour (on reel)
  • Cochineal overdyed with black walnuts (lower row, center)
  • Indigo overdyed with cochineal (bottom, second from left)

We also put together a goodie basket to be sold at the raffle for the Conference of Northern Califiornia Handweavers (CNCH) conference in 2020. Here is what we have so far.

A lovely day with much accomplished!

Dyeing for Red

For centuries red has been revered–and hard to come by–as a color to dye for. Its scarcity, along with purple, has often made it a color reserved for royalty. But over the centuries some recipes have been developed to achieve a vibrant red. This month we are dyeing some of our wool with cochineal, a red dye developed in South and Central America. This dye was developed from beetles(!) that live on cactus plants. It has been used as the Navajo red made famous in some of the early rugs from the Navajo nation.

The process is not simple. We mordanted our wool. (That means pre-treating it with an oxide solution to help fix the dye so it won’t fade). We had purchased a few ounces of the dried cochineal beetles which we ground in a coffee grinder that we use exclusively for our dyeing. We mixed these powdered beetles with water and simmered the mixture for an hour. We then took our warmed damp mordanted wool skeins and simmered them in the dye bath.
Some of the skeins we had already dyed yellow of blue, so we were overdyeing them to see what colors we might get.

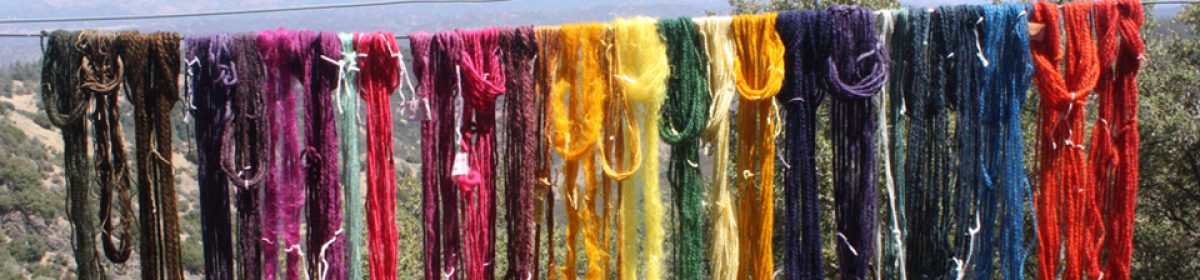
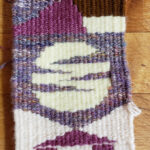
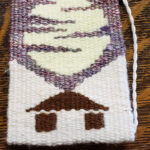
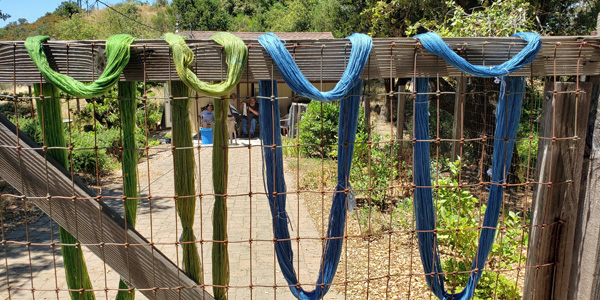
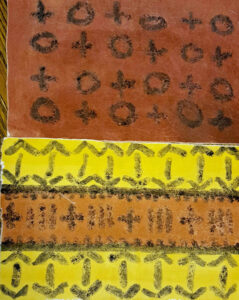
Here is the result of our adventure.

As usual we had a few surprises but were very impressed with our results.

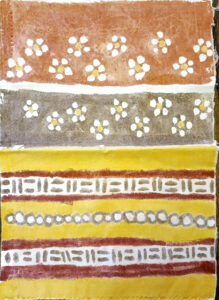
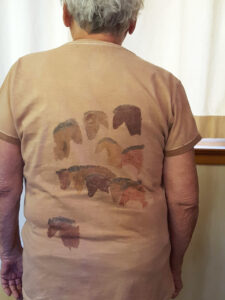
We now have the following tapestry wool for each of the members. The first photo, from left to right, shows wool dyed in weld (top), dyed in osage orange (bottom). The next two skeins are indigo dyed dipped three or four times (top) and dipped one time (bottom). The third set of skeins are the weld and osage orange skeins over-dyed with one dip in indigo and the last two skeins were over-dyed three or four times in indigo.
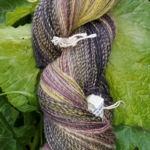
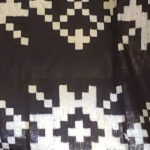
The second photo is weld over-dyed with cochineal and osage orange over-dyed with cochineal.
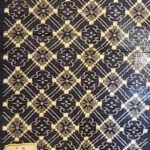
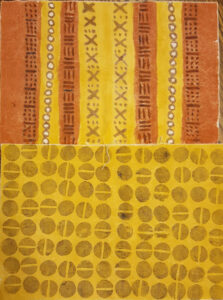
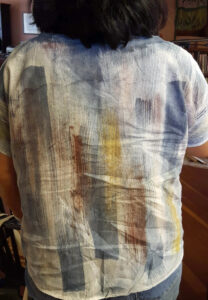
The third photo is indigo dipped four times and over-dyed with cochineal.


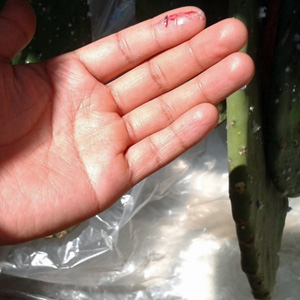
In 2012 I visited two Zapotec weavers, Jaime and Joey, who lived in the Central Valley. Jaime’s family, originally from Mexico, had been weavers for four generations. Hanging on the front porch were a number of cactus pads, which Jaime’s father had gathered from the desert in Southern California. The cactus was home to cochineal beetles who protect themselves from the desert heat by surrounding themselves with a white “insulation” which they produce somehow.cochineal beetles on cactus

Jaime crushed one of these “cocoons” to show me the red produced by the beetles, which are dried before being used. (They literally die for dye!)

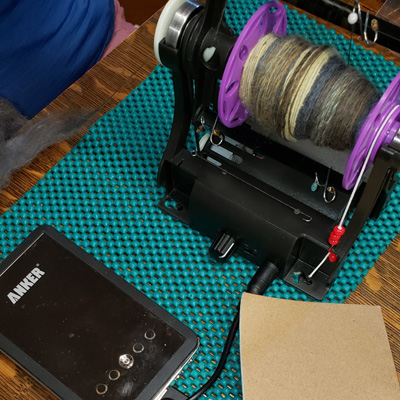
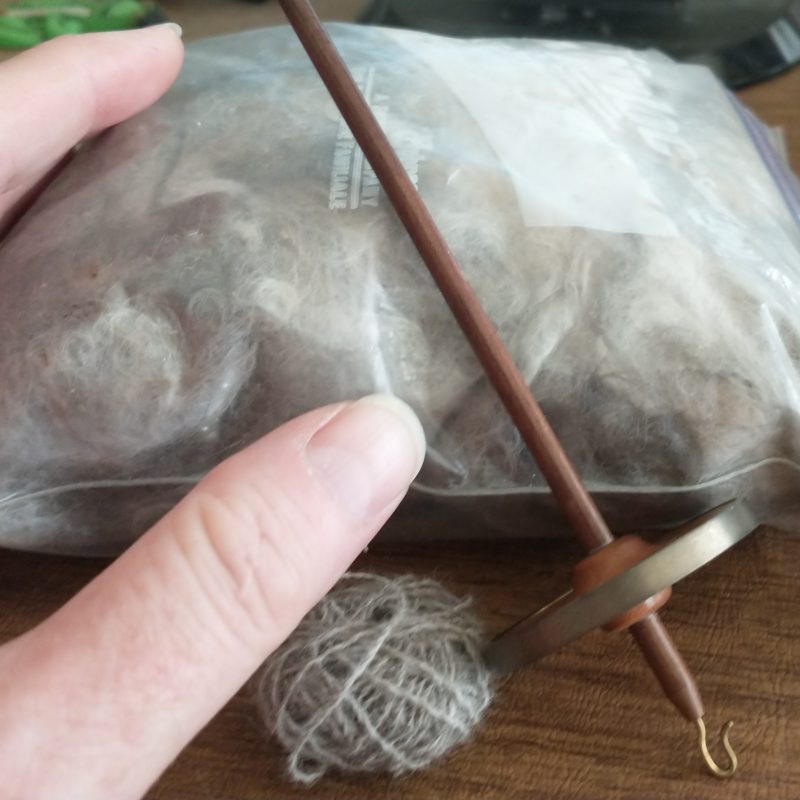
We also were intrigued to see Sharolene’s new tiny spinning “wheel”. This little portable device is an electric spinner that can run off a battery, is speedy and versatile, and makes almost no noise. See more about it here.
photo of very small spinning wheel

A Blue Sunday

We started our natural dye project in earnest. This will give us colored wool to use in the tapestry project we have started. This month we activated our indigo pot. We have one that we store in a covered pot so as not to waste any of our indigo, We bring the pot out several times a year. Normally we do this outside in the summer. This helps bring the temperature of the pot to an appropriate level by using some sunlight and allows us to do the entire process outdoors. We are dyeing carefully weighed wool skeins that we will continue to use in upcoming months to over-dye with other colors to get a number of colors to use in our tapestries. Some have already been dyed another color and we will overdye them with indigo blue.

The indigo bath must achieve the right pH and the right temperature in order to successfully produce color. We heat it if we need to and add commercial dye remover until we achieve the appropriate pH. We must be careful not to introduce oxygen into the pot which, amazingly, looks like its green, not blue.

dipping a yarn skein into an indigo dye bath

When the yarn is removed from the pot, it looks green. But as it gets oxygen from the air it starts turning blue . It’s magic!

But the yarn that had already been dyed yellow turns green!

four skeins of blue and green yarn drying on the fence

This is just the beginning! More colors to come.


New Year, New Project

This month everyone came prepared to launch a new tapestry project. Sandy has been doing tapestries for some years and has studied with some of the best instructors. She was prepared to get us all started. This included building our own copper looms from parts she had assembled into a kit for each of us–which even included a handmade carrying pouch that could accommodate the loom and necessary tools.

When the loom is assembled it can stand upright and has adjustments on the side bars to tighten or loosen the warp.We spent the first hour assembling our looms.Next came the warping instructions. Sandy had pre-cut enough 12/8 warp strands to make a three inch warp width. We half-hitched each doubled strand to the top beam of the loom and tied the strands together with a square knot around the bottom beam (as opposed to using a single strand that wrapped back and forth around both beams) .And finally it was time to weave. We established a base and wove a few rows. Next month we will start exploring shapes.


November 18, 2018 – From ikat to tapestry

Fiber Artisans met to finish their ikat projects and prepare for next year’s tapestry project. As they sampled the wonderful variety of homemade cookies Phyllis brought,

Sandy, Frank, Phyllis, Sharolene, Christine and her sister, Ann and Anne presented their insights, ideas, and questions about their ikat projects. Frank then showed the dazzling, jaw-dropping collection of indigo-dyed ikat pieces he has collected over the years.

Phyllis also brought a sample of her handspun natural colored cotton fabric.

fabric woven from natural colored cotton

We then talked about the future tapestry weaving project. In addition to constructing our looms from copper tubing, we will need the following equipment that Sandy showed us.
This includes (from top to bottom) beaters, scissors, a mirror (to see the reverse side), clips, a ruler, bobbins, a basket to hold our stuff, and a bag to keep it in.

We will meet again in January to get started.

August 26, 2018 – Ikat and More


Today we learned about removing the warps we have been carefully tying In patterns that will resist dyes from the frames. This will make them ready to dye with indigo next month. Our warps were mounted on frames with dowels that stretched them back and forth on the frames. This made it possible to tie our resist patterns efficiently for several repeats with one tie rather than having to tie it several times down the entire length of the warp. Each time the warp was doubled back on itself on the frame, it was held in place by a new dowel that was placed behind two pins at that end of the frame. Depending on the length of the warp, this meant there were multiple dowels holding the warp.


We started by placing ample loop ties through the warp wherever we had a dowel holding the warp to the frame. After doing this, we carefully removed the dowels and gathered all the loops from both ends in one hand. This will permit us to lower and then retrieve the warp in our indigo dye pot when we dye it next month. Multiple dips will allow us to control the depth of shade of the indigo. So check back next month to see how we are doing.


You may remember that last month we experimented with some natural dyes from Earth Pigments. After mixing our dyes and learning the process of using the dyes, we took our sample dyes home. Everyone had a limited range of colors to use. Some of us had some amazing work to show and information to share about what worked best for us. Here and some of our results.

Frank stamped patterns on a number of swatches of cloth. He learned which colors work best when used on top of other colors and came up with an amazing number of objects to use as stamps for his swatches. Here are six of his swatches.

Sandy had studied the cave and wall art of our very early ancestors and honors them by copying some of their figures on T-shirts that use the colors of the earth.

Ann also choose to create garment art. Using the stamping technique for the front, she found some of the color had leaked onto the back, despite using a separator to keep this from happening. So she picked up a brush and painted her colors on the back.

Next month: an indigo dye pot and who knows what else!