January 2024 – Madder, Indigo, Pin Looms, and More!

We had a very productive meeting last Sunday.

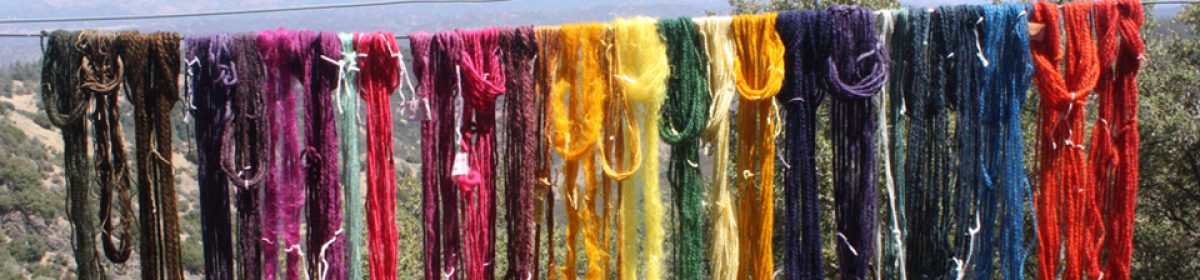
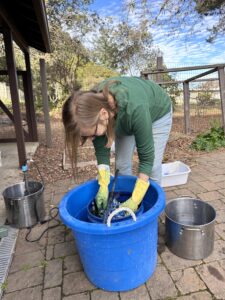
We learned that if the Indigo Pot gets over 135 F, the indigo starts to solidify and the pot gets a foam on top. Once it cools down to 135 F the pot dyes ok, no harm done. So don’t heat the dye pot over 135 F.

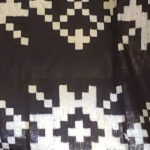
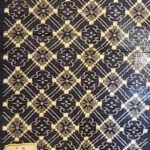
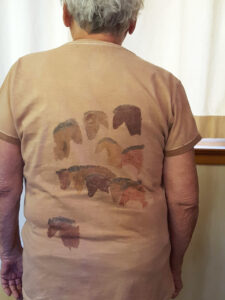
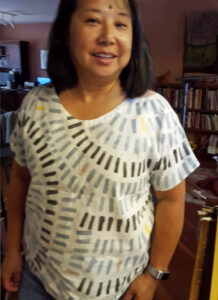
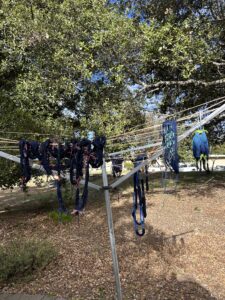
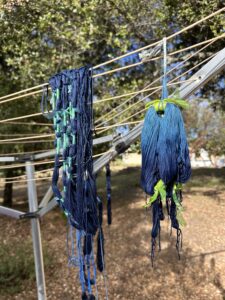
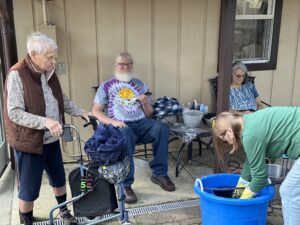
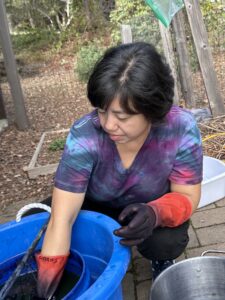
Sandy, Christine, Sharolene,  Marcia, and Frank dyed their warps.  At this point it sounds like everyone has completed dying their Ikat warps.  So, there is no need to do Indigo dyeing for a while.


Anne, Sharolene, and Marcia dug madder.  There was not enough to use for dye, but Christine and Julie took what was found to plant in their gardens.  We had a discussion about processing madder root so it can be used for dyeing.  Frank showed us tools that you can use to clean the madder and process it, including a scrub pad, tenderizing tool, and potato peeler.

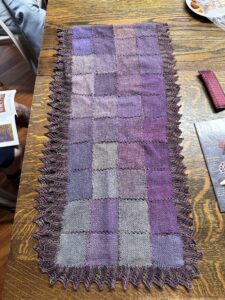
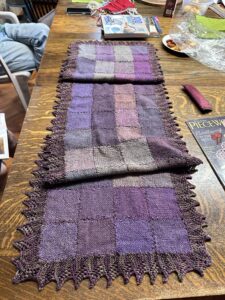
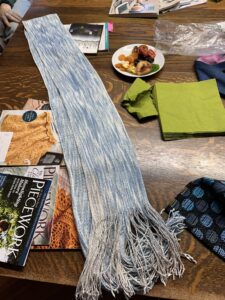
We then talked about the Pin Loom Friendship project.  Marcia showed her collection of samples made on pin looms and books on pin loom weaving.  Marcia also lent pin looms out to Christine, Julie and Frank.  Sandy decided she would buy her own Zoom loom to use.  Marcia gave an impromptu demonstration of how to weave on a pin loom.  Sharolene showed us a scarf she made out of pin loom squares.  She spun all the yarn for the scarf and added a lace knit edging around the scarf.

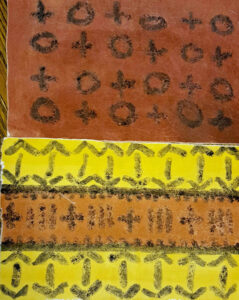
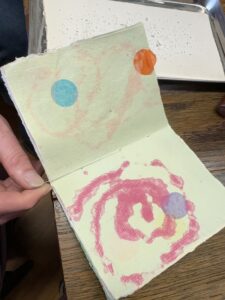
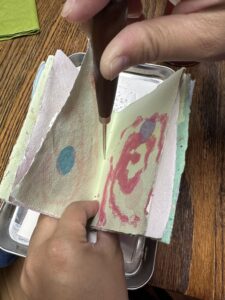
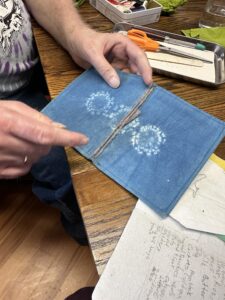
Frank also showed Julie how to make booklets from our handmade paper and showed his handmade fabric booklet cover.

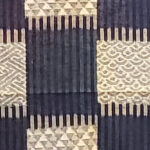
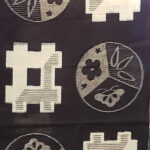
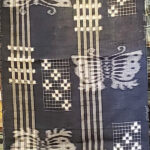
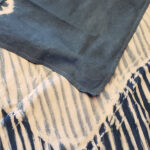
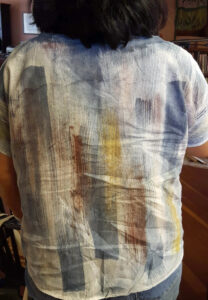
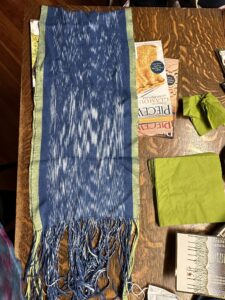
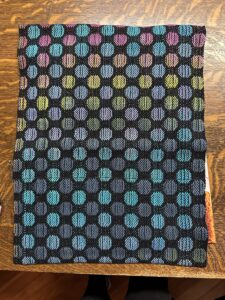
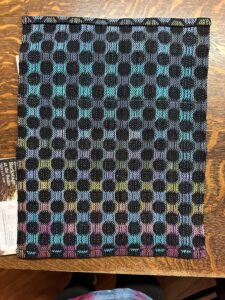
Other show and tell – Marcia and Sharolene showed us their ikat scarves.

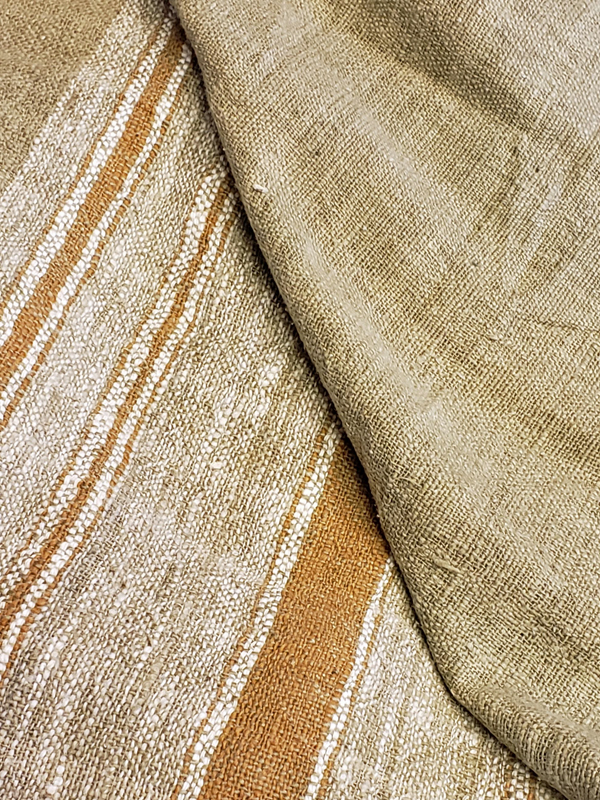
And Sharolene showed us her turned taquete towel.

For the pin loom project, we decided:

  • We will be using 4 inch pin looms.
  • Worsted weight yarn or thinner.  Sharolene’s scarf was more of a fingering weight.
  • 6 inch needles to weave with.
  • We will be weaving plane tabby squares.  We will NOT be weaving bias squares.

We then discussed what we wanted to do about our donation for the CHNC auction.  We decided to donate a spinning project.

  • Anne will donate colored wool she drum carded.  She will store the wool until the February meeting.
  • Frank will donate a drop spindle and some commercial roving.
  • Marcia will donate knitting needles and a knitting pattern.
  • Sandy will donate a weaving pattern.
  • Marcia will buy tissue paper and ribbon for the Guild to package everything with.


November 18, 2018 – From ikat to tapestry

Fiber Artisans met to finish their ikat projects and prepare for next year’s tapestry project. As they sampled the wonderful variety of homemade cookies Phyllis brought,

Sandy, Frank, Phyllis, Sharolene, Christine and her sister, Ann and Anne presented their insights, ideas, and questions about their ikat projects. Frank then showed the dazzling, jaw-dropping collection of indigo-dyed ikat pieces he has collected over the years.

Phyllis also brought a sample of her handspun natural colored cotton fabric.

fabric woven from natural colored cotton

We then talked about the future tapestry weaving project. In addition to constructing our looms from copper tubing, we will need the following equipment that Sandy showed us.
This includes (from top to bottom) beaters, scissors, a mirror (to see the reverse side), clips, a ruler, bobbins, a basket to hold our stuff, and a bag to keep it in.

We will meet again in January to get started.

August 26, 2018 – Ikat and More


Today we learned about removing the warps we have been carefully tying In patterns that will resist dyes from the frames. This will make them ready to dye with indigo next month. Our warps were mounted on frames with dowels that stretched them back and forth on the frames. This made it possible to tie our resist patterns efficiently for several repeats with one tie rather than having to tie it several times down the entire length of the warp. Each time the warp was doubled back on itself on the frame, it was held in place by a new dowel that was placed behind two pins at that end of the frame. Depending on the length of the warp, this meant there were multiple dowels holding the warp.


We started by placing ample loop ties through the warp wherever we had a dowel holding the warp to the frame. After doing this, we carefully removed the dowels and gathered all the loops from both ends in one hand. This will permit us to lower and then retrieve the warp in our indigo dye pot when we dye it next month. Multiple dips will allow us to control the depth of shade of the indigo. So check back next month to see how we are doing.


You may remember that last month we experimented with some natural dyes from Earth Pigments. After mixing our dyes and learning the process of using the dyes, we took our sample dyes home. Everyone had a limited range of colors to use. Some of us had some amazing work to show and information to share about what worked best for us. Here and some of our results.

Frank stamped patterns on a number of swatches of cloth. He learned which colors work best when used on top of other colors and came up with an amazing number of objects to use as stamps for his swatches. Here are six of his swatches.

Sandy had studied the cave and wall art of our very early ancestors and honors them by copying some of their figures on T-shirts that use the colors of the earth.

Ann also choose to create garment art. Using the stamping technique for the front, she found some of the color had leaked onto the back, despite using a separator to keep this from happening. So she picked up a brush and painted her colors on the back.

Next month: an indigo dye pot and who knows what else!


Progress!

Five of us met to continue tying off sections of our ikat warps. (Most of us only work on these the one day each month when we meet.) We are hoping to have them ready for the dyepot sometime this summer. Each will have a different pattern of threads that have been carefully bound together to resist the dye and will produce a white pattern on the final cloth. Thank heavens we have Natalie’s instructions on how to tie off each section posted here . We all needed a refresher course in how to bind the pattern threads. This is a slow, but pleasant, endeavor. It will be exciting to see how it comes out.

five ikat warps with ties on some warp threadsAnn is particularly ambitious and has the wide warp shown at the bottom. She is not following a rigid pattern like most of us but is making a free form design that she is creating as she ties each bundle of warp threads.

February’s Ikat Update

On Sunday, February 18, we met to continue our ikat project. Most people had their ikat frames warped and were ready to tie bundles of warp with tape that with resist the dye when we eventually dip the threads in an indigo dye pot. We found that Natalie was particularly adept at wrapping and tying her warp threads. Here is a video showing her technique.

November 19, 2017 – More ikat

Colorful ikat dyed scarfAfter our introduction to warping for ikat last month, we continued our projects. We found that we needed plenty of space to stretch out our warps in order to prepare them for tying off areas that would resist the dyes we would later use. And several of us found that it would have been easier to start with smaller warp widths than we had imagined for or projects. For example, Frank had used nine separate warp chains to weave the beautiful scarf shown above.

To accommodate our long warps, one of our members who works for Google took advantage of using the “Garage”, a work-space on the Google campus that employees can reserve for creative endeavors. It worked perfectly, allowing us to stretch out our warps and start bundling and tying them for dying.

Interior of the Google "Garage"One of us just starting the project learned from the experience of some of the rest of us and wound a warp for a 2-inch wide project. She easily caught up with others struggling with much wider warps.

a narrow warp And Shar, who had a disaster last month when her warp accidentally was severed, has forged ahead and is already wrapping her warp threads threads to resist the dye.

wrapping bundles of threads with plastic tapeThe saga will continue in upcoming months.

October 29, 2017 – Planning the ikat warp

Today some of us started planning our ikat warps under the experienced eye of Frank and with the help of the instructions that can be found here. Some of us used a warping board and some used a frame, but the challenge came in twining around designated bundles of warp threads that will be wrapped to exclude the dye. Next month we will proceed to the next step.

Using a warping board
Using a frame
Stretching the warp


September 17, 2017 – Starting our ikat project

Frank presented a detailed, hands-on overview on how to get started on a project that will continue for a few months. Ikat is a dyeing technique used to pattern textiles. Bundles of warp threads are tied securely before they are woven so that they will resist dye when they are immersed in a dye bath. The ties are then removed before being put on a loom. This produces patterns in the cloth made with the undyed areas of threads. It is a time-consuming technique used by a number of cultures.

Frank had a warp that he has created that is ready to dye. In the photo the areas that look red and purple are warp threads that are tied together with red and purple plastic tape that is designed to keep dye from the threads. These areas will remain white when the warp is immersed in a dye bathe. The frame is simply a way of holding the threads taut so they can be tied with this tape in a pattern that the weaver would like to leave undyed. The warp threads will be removed from the frame, dyed, and then the tape will be removed before they are threaded onto a loom for weaving.

undyed warp stretched on frameThe process of putting the warp on the frame and tying the bundles is complex and exacting. We spent much time learning how it was done and planning projects to create. More will be happening in the next months.

This is a video of member Phyllis Karsten tying a piece of plastic resist onto a bundle of yarn:

[wpvideo oyff4ha1 w=400]