September 21, 2015 – Beginning Bookmaking

We met on an extremely hot day and met early to beat the heat. The subject for our September meeting was making covers for handmade paper notebooks. Frank Mikulastik was our fearless leader. Frank makes 40 pieces of handmade paper in his kitchen on Sunday afternoons!  Frank is a good teacher and showed us how to size a cover for the size of the paper, told us what materials to use and showed us how to sew a signature into a cover. He is quite inspiring with his own indigo dyed notebook covers.

Sandy brought some leather that we cut for notebook covers. She was able to cut them to size with a metal ruler and a box cutter. She made them big enough for two signatures. It is a nice pliable soft leather and will be great for notebook covers.

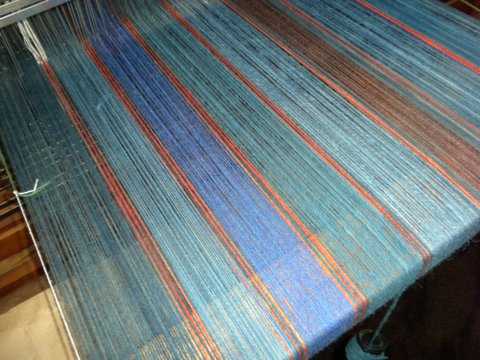
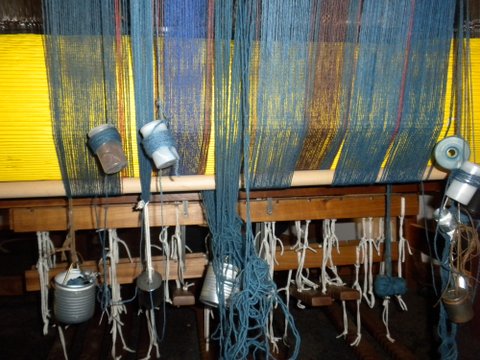
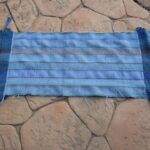
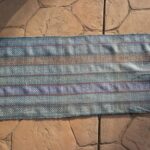
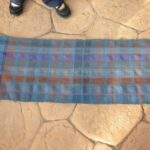
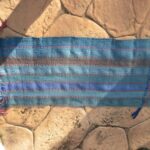
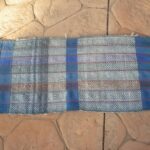
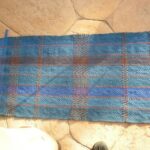
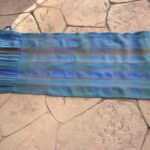
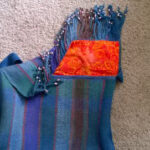
Sharolene shared her madder dyed fiber that she dyed in the last few weeks, linen towel that she just pulled off the loom and cotton from the garden. The madder process was

Sharolene's Linen Kitchen Towel, just pulled from the loom.
Sharolene’s Linen Kitchen Towel, just pulled from the loom.
Madder from Phyllis' and Sharolene's garden were used to dye this yarn.
Madder from Phyllis’ and Sharolene’s garden were used to dye this yarn.
Sharolene's madder dyed fiber. Madder was dug from Phyllis' and Sharolene's gardens.
Sharolene’s madder dyed fiber. Madder was dug from Phyllis’ and Sharolene’s gardens.
Notebook made with handmade paper and store bought batik fabric cover.
Homegrown cotton
Sharolene’s Homegrown cotton
Sandy making her handmade paper notebook.
Leather cutting for notebook covers
The designs on the paper were from liquidized paper, squirted on after the paper was made.
Frank used a cut plastic bottle and poured liquid paper into it for the designs.

Attendees at meeting were:  Phyllis, Frank, Sharolene, Sandy, Marsha and Carol Lewis (new member).

Sharolene’s Spinning, Knitting and Weaving

I majored in fine art in college and studied color extensively. Water colored landscapes and flowers cover the walls of my home. This study of color has helped me in many ways throughout the years and has followed me into fiber arts.  In 2004, a friend of mine got me interested in spinning. Not long after that, I bought a spinning wheel and the rest is history, as they say. Today I have 5 spinning wheels of different sizes, 4 looms and an attic full of fiber. I have a blog on Google’s blogger website (although I don’t keep it up regularly). If you’d like to see some of my past work, you can go here. (I shortened it here with TinyUrl). http://tinyurl.com/pvkogg6

Some photos of my recent work are here:

P1030277                               Drall Towels      WP_20140811_001


Frank’s sock

We in Fiber Artisans have had sharing workshops to learn how we each warp a loom.  One very neat trick learned was how Frank keeps his pattern and heddles straight and double checks for mistakes along the way.  He counts out how many heddles he needs for a pattern, wraps all the others with his long sock.  After weaving the pattern he double checks for any threading errors.  If you do not use all your heddles or have some left over you know right then you have made an error. Easy to correct as you go along.

Franks, sock holding heddels out of the way

2015 CNCH Scarves

DSCN2417DSCN2399

CNCH Area Five is responsible for the conference next year.  As part of  Area Five Fiber Artisans has taken on the task of weaving the scarves for all the teachers and volunteers.  We are doing the colors from Monterey Bay Ocean that were chosen for the CNCH 2015 colors. Here are some of the first pictures of the fiber and scarves.

Six of our weavers have agreed to weave an 8 yard warp for a total of 6 scarves when they are finished.  They each have  72 ends of Ocean Blue Tensil,  44 ends of Aqua, 28 ends of Jade and 6 of Jasper.  The weft is either Blue or Aqua, they may place their colors where ever they choose.  Each scarf will have a jelly fish placed on it in what ever manner the weaver chooses.  Embroidered, felted, Theo Moorman technique.  Innovation is the name of the game.

Our 2014 Bag Project

For the Conference of Northern California Handweavers in 2014 we wove bags. Everyone contributed some of their yarn. Some was handspun, some dyed with indigo, some with a special meaning to the member. A loom was warped with a section from each of these yarns and members each wove a section of the warp with the weft of their choice. Each then chose how to finish the bag.

striped warp on the loom
We started with a warp made up of yarns, mostly handspun, that we had dyed earlier with madder and indigo. Each of us is represented by one stripe in the bag.
photo of a woven section on the loom
Each of us used our own weft to weave a section long enough to make a bag.
Because of the differences in the elasticity of the warp yarns, the back of the loom became a mess. We hung weights on the loom to keep tension on the yarns.
Some of the yarns were two ply, and some singles. We kept the singles controlled by lashing them to the madder stripes (using some medical tools).


Too much fun! We are all set to get started on our next group project.

Cotton Ikat Jacket

Phyllis Karsten's Ikat Jacket

I consider this my most spectacular project – also it is one of the best pieces of weaving I’ve done. The third place ribbon from the CNCH judges at the Marin fashion show got it wrong. their comment was that it didn’t hang straight.

Well,  it was not intended to be a up-tight western style jacket. It was patterned after a Japanese style that is OK to hang loosely.

And,  I didn’t want to have shoulder pads in the jacket as they would either be inside the lining, which would mean that I’d have to open up the lining if the pads deteriorated. I didn’t like the appearance of pads tacked to the outside of the lining. I solved that problem by putting shoulder pads in the blouse that I made to go with the jacket. The judges didn’t know that. Next time I will be certain to add a note to my entry – A little learning opportunity on entering items.

I usually wear the jacket with blouses that have no shoulder pads. It hangs loosely with the expected informal hem line, but looks just great!.